How to use Gobos in Blender
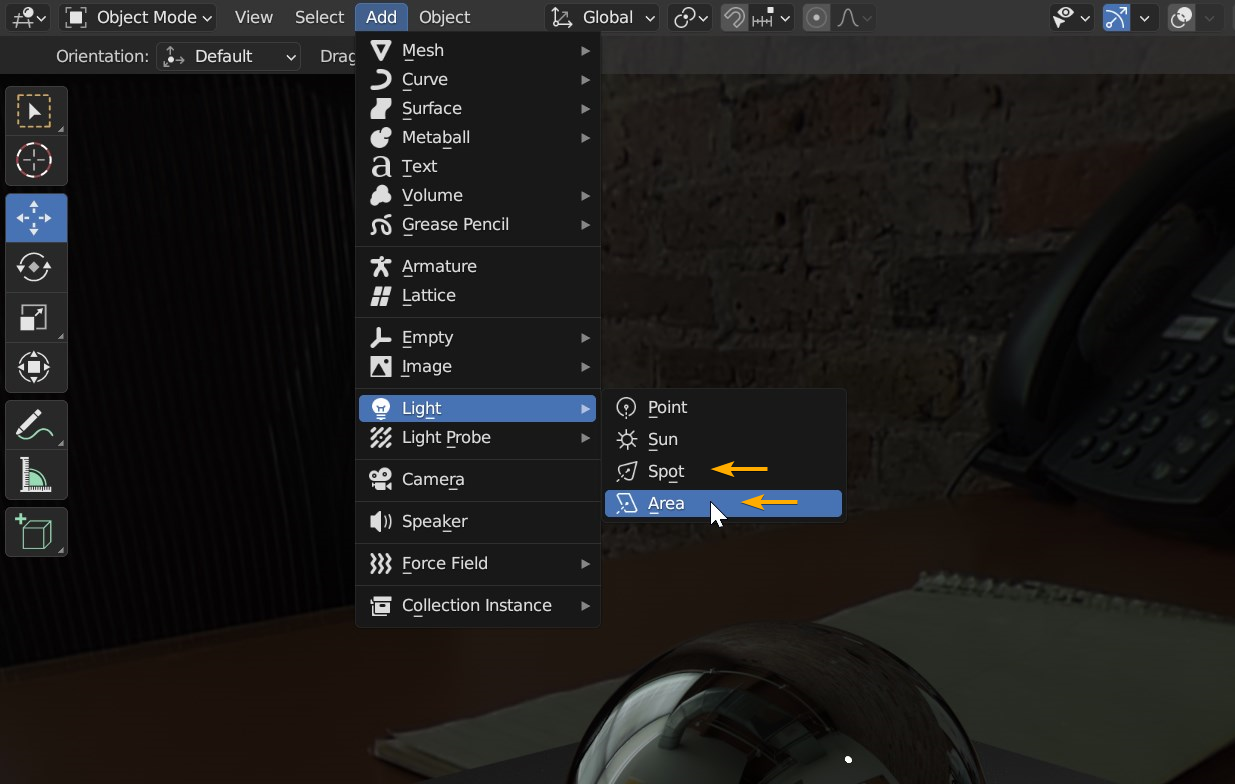
- After you download and extract the Gobo texture, start Blender and add an Area Light or Spot Light to your scene. Select Cycles as render engine and enable Viewport Shading: Rendered mode. Also go to World Properties > Surface and reduce the "Strength" value so you can see the Gobo texture pattern better when you load it.
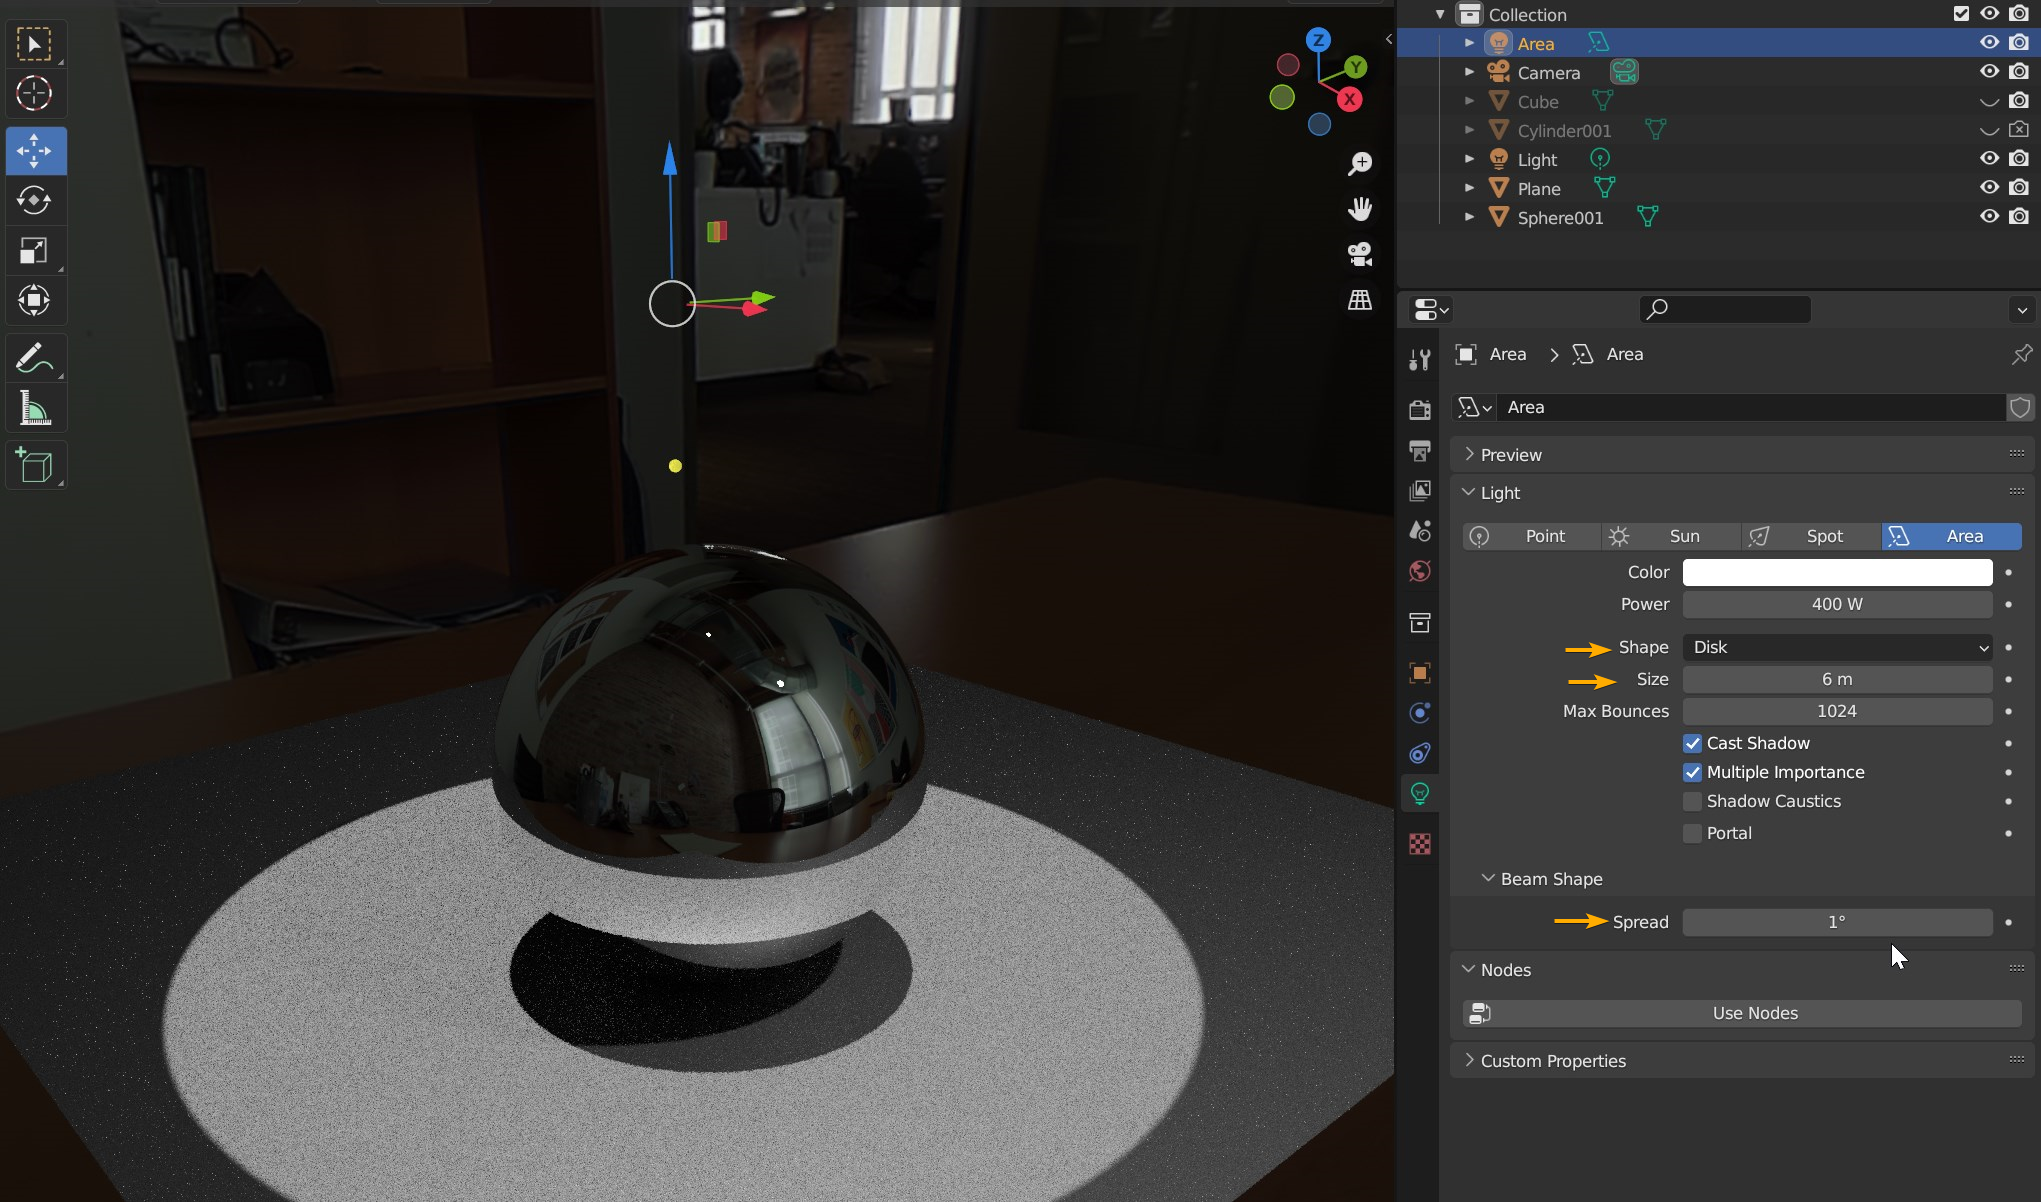
- Select the Area Light and go to Object Data Properties. Select "Disk" as shape. Set the Beam Shape > "Spread" value to "1" and adjust the "Size" and "Power".
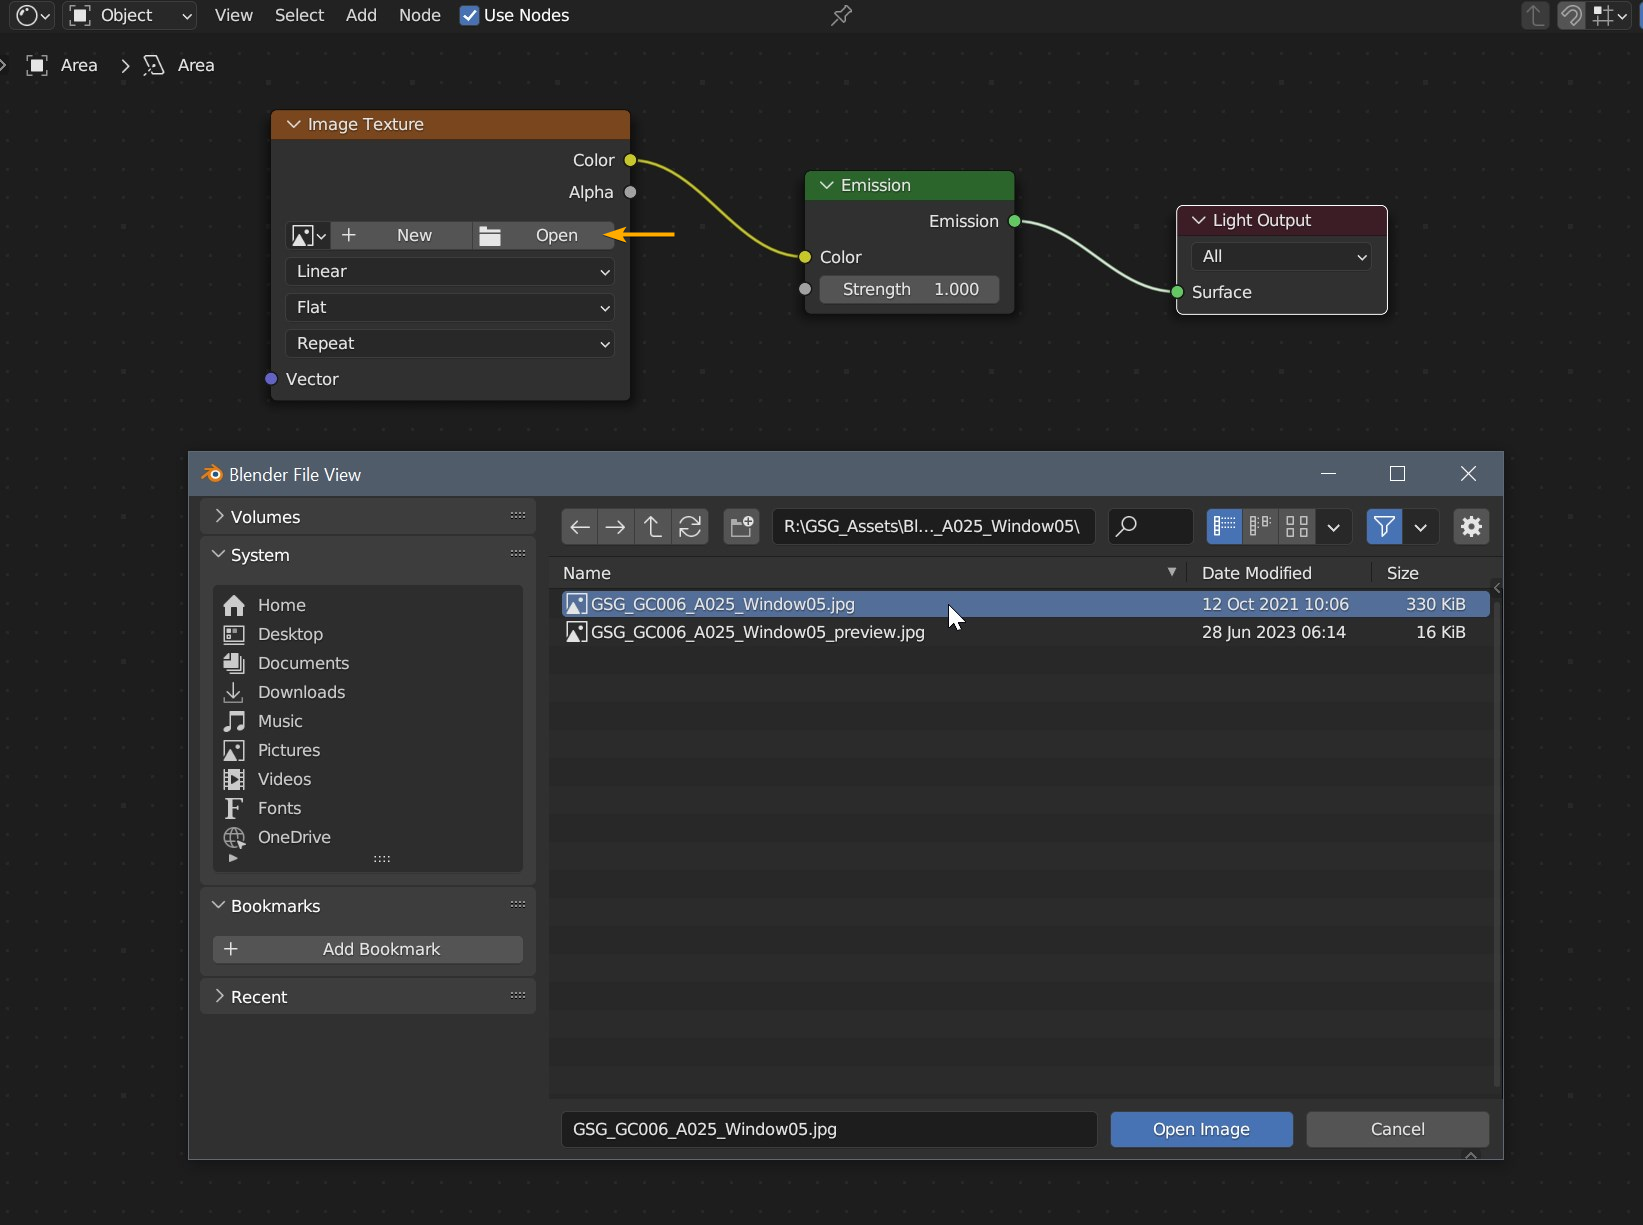
- Select your Area Light and then go to Shader Editor and switch to Object Shader. Use shortcut "Shift + A" and select Texture > Image Texture to add the node. Click Open on the Image Texture node and browse for the downloaded ".jpg" file and open it.
-
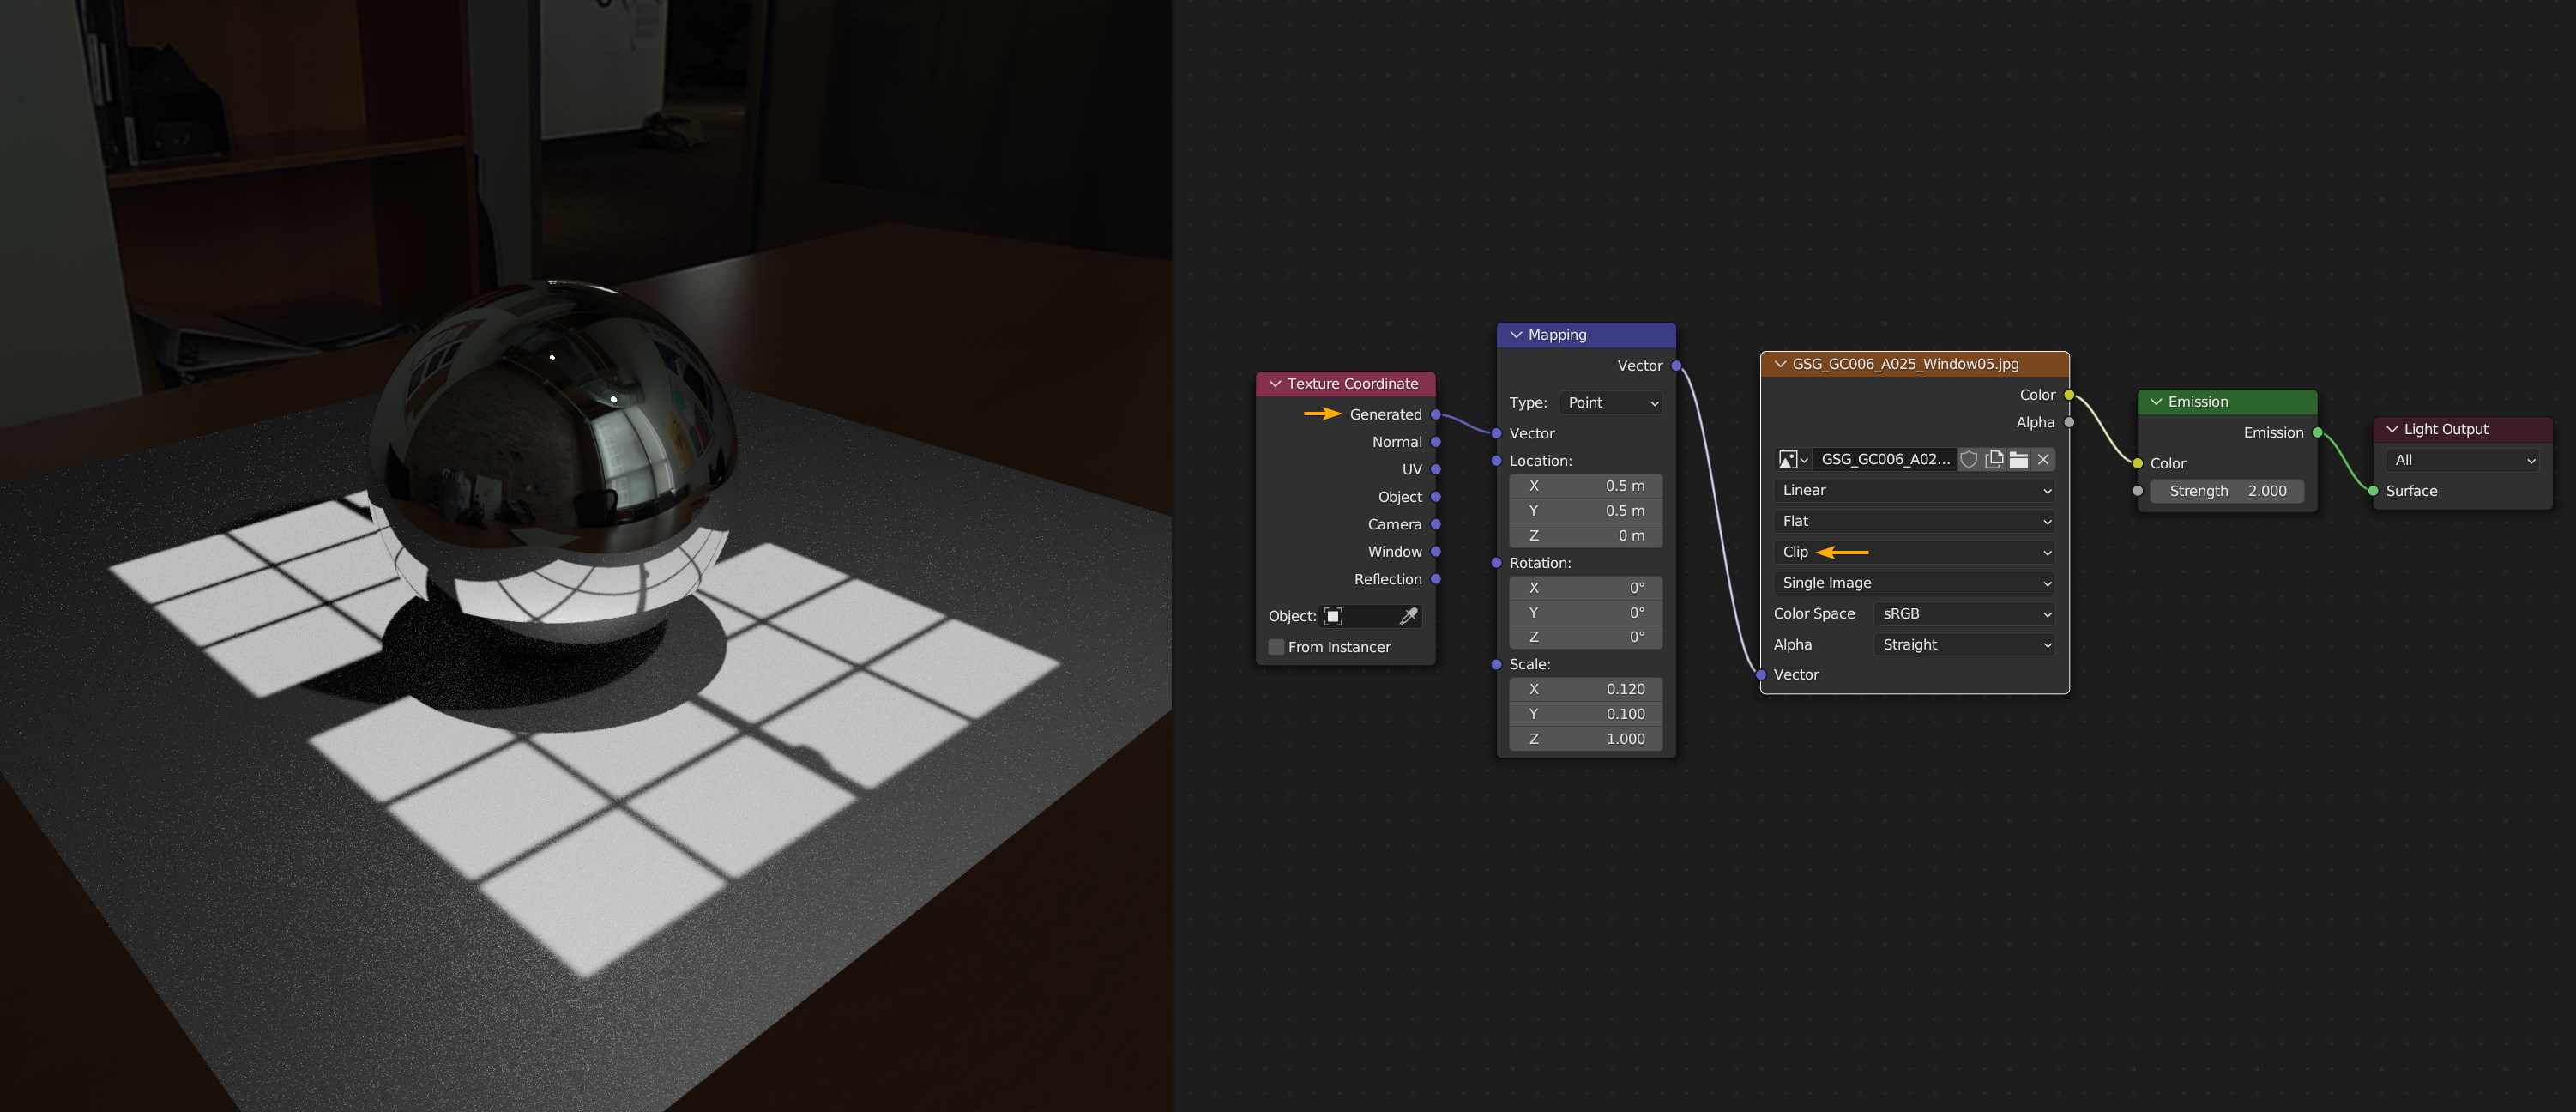
If you enable "Node Wrangler" from Preferences > Add-ons you can use the shortcut "Ctrl + T" to add "Texture Coordinate" and "Mapping" nodes to adjust the Gobo texture scale and offset.
Connect "Texture Coordinate - Generated" output to "Mapping - Vector" and set the extrapolation type to "Clip" on the Image Texture node.