Cinema 4D Connector Plugin Installation
This guide is applicable for both Windows and macOS, depending on what version of Cinema 4D and OS you have, your UI may be different, but the process is the same.
Video Guide
Step by Step Instructions
1) Download the Connector plugin for your Cinema 4D version from here.
Important Note: Connector plugin is compatible with Cinema 4D 2024 and 2025 versions.
2) Extract the downloaded "GreyscalegorillaStudioConnectors.zip" file.

3) Browse into the extracted folder and copy the Cinema 4D plugin folder for your version:
i.e. GreyscalegorillaCinema4DConnect_202x_Win

4) To access Cinema 4D plugins folder you can run Cinema 4D and go to Edit menu > Preferences then click "Preferences Folder" button. (After you have access to the folder, please shut down Cinema 4D)

5) Then paste into the plugins folder.
(If there is no plugins folder, you need to create a folder and name it as plugins)
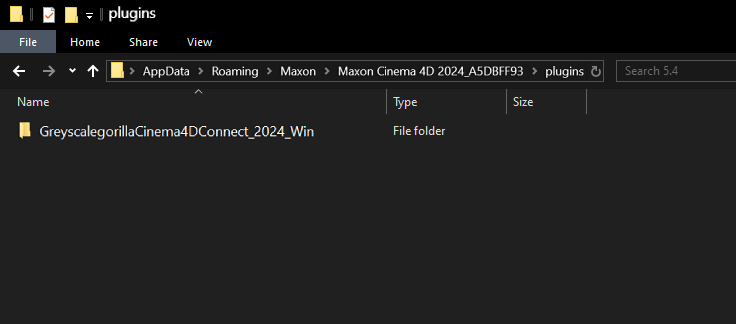
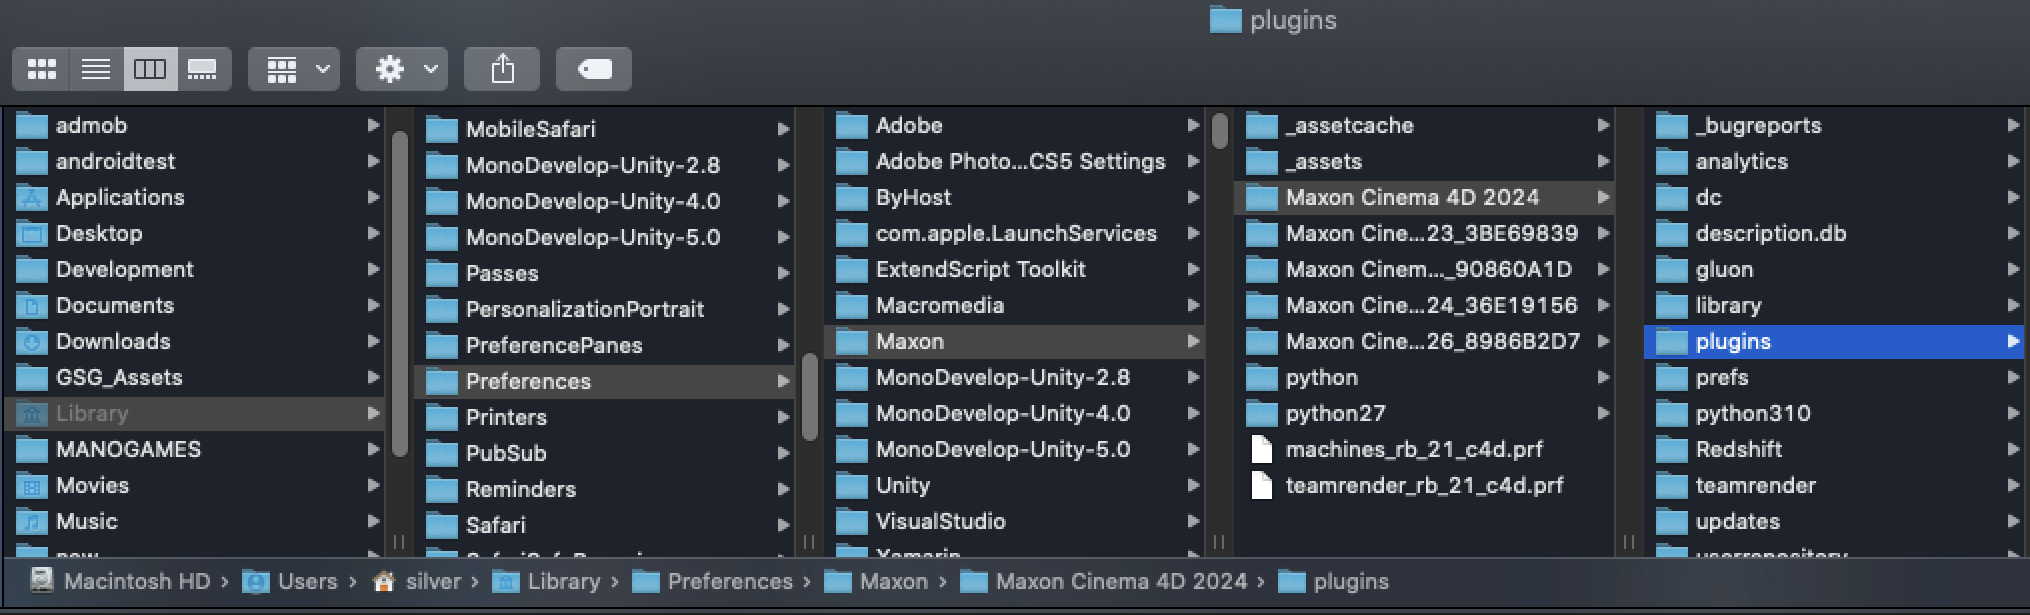
Confirm that you install to this path:
(Windows) C:\Users\YourUser\AppData\Roaming\MAXON\Maxon Cinema 4D 202x\plugins
(macOS) \Users\YourUser\Library\Preferences\Maxon\Maxon Cinema 4D 202x\plugins
Important Note: Installing the plugin into a different directory might cause problems and it may not work properly.
6) After you finished copying, you can launch Cinema 4D.
7) Then launch Greyscalegorilla Studio App and select Cinema 4D as 3D Application from settings then close settings window.

8) Click "Connect" button. The button color will change to green and show it's connected to Cinema 4D. Now you can use the assets from GSG Studio App.

Cinema 4D Connector Preferences:
These options are only available in Cinema 4D.
You can access from Cinema 4D > Edit menu > Preferences >Greyscalegorilla > C4D Connect
(if you do not have the HUB installed then it just shows up under: Preferences > C4D Connect)
- Assign Material To Selected Objects: If this option is checked when you send a material to Cinema 4D it will automatically add it to the selected objects in the scene.
- Assign Material To Selected Polygons: If you are in Polygon Mode and have some polygons selected, then when you send a material to Cinema 4D it will automatically apply the material to the selected polygons. You must also have "Assign Material To Selected Objects" enabled for this option work.
- Copy Textures To Tex Folder: If checked it will make a copy of the textures in the local 'tex' folder next to your saved C4D file. The materials will then use the filename of the texture only, instead of the full path to the asset in your assets folder.
