Greyscalegorilla Studio Installation Guide
In this article:

This guide is applicable for both Windows and macOS, depending on what version of OS you have, your UI may be different, but the process is the same.
Greyscalegorilla Studio Installation
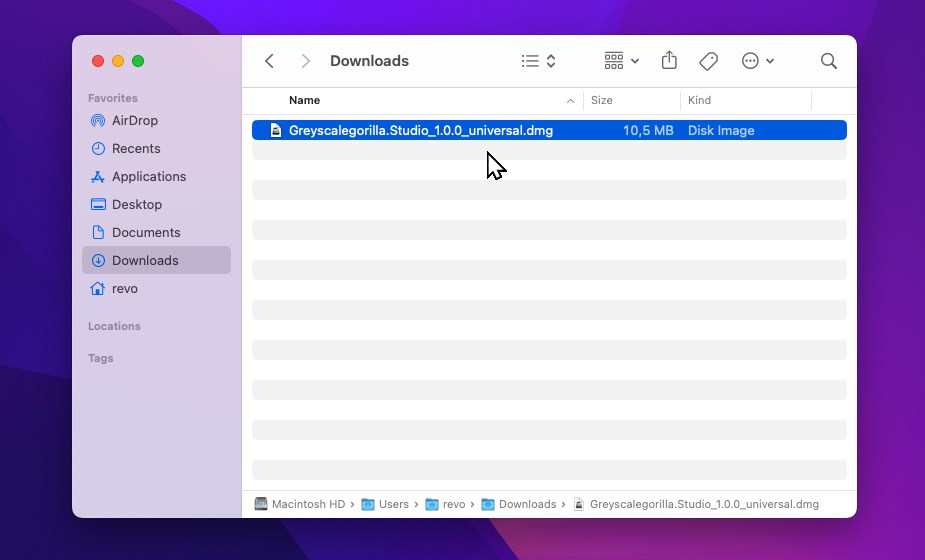
1) Download Greyscalegorilla Studio from this link and run the installer.
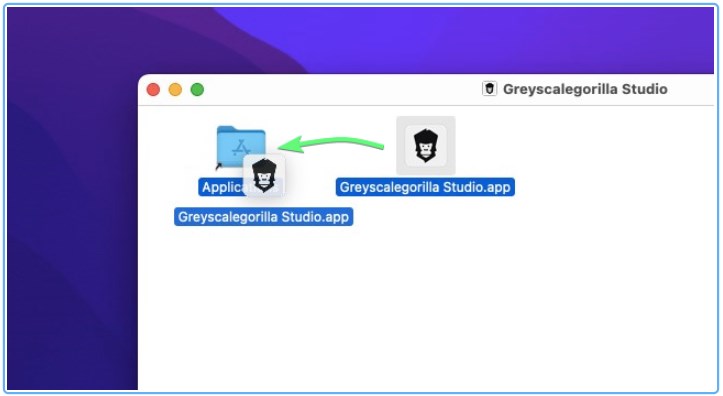
On macOS a setup window will pop-up and then you can drag the Greyscalegorilla Studio icon over the Applications folder to complete the installation.
If you are having trouble connecting Studio or sending assets to your 3D software, you may need to update your computer's permissions located in your Mac settings.
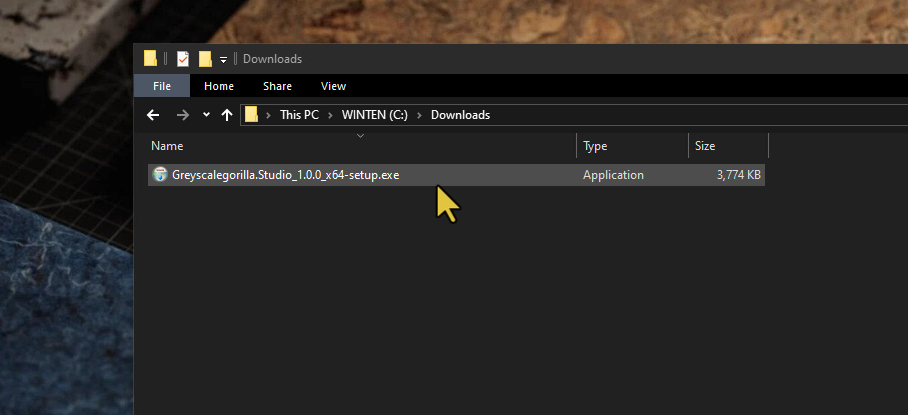
On Windows run the setup file and confirm each step until completed.

When finished start the Greyscalegorilla Studio and click sign-in.

Use your Greyscalegorilla account email and password to sign-in.

Once you've signed in, you will see the settings window. First thing, please set a folder for downloadable assets.
Important Note: If you are also a Cinema 4D HUB user make sure you don't use same assets folder. Studio requires its own assets folder and assets.

You can use your Documents folder or any location you have full write permission. Please check the note at the end of the guide.
Important Note: If you are using Mac you can use shortcut "Command + Shift + N" to create a new folder in Finder.

Greyscalegorilla Studio can connect to Cinema 4D, Blender, Houdini, Substance Painter and Unreal Engine. You can choose your preferred 3D application in the settings and switch to another one anytime you need to.

Now click "Get Connector Plugins" button to download or click this link.

Click here to go to the top of the page and view the links for the Connector plugin installation guides for each 3D Application.
Important Note: macOS users please make sure you allow Studio and your 3D Applications (Cinema 4D, Blender, Houdini, Unreal Engine, Substance Painter ) to access "Files and Folders" under Apple System Settings > Privacy & Security > Files and Folders.
Check this Apple help document for advanced permission settings.

Changelog
Studio App 1.5.1 – 09.15.2025
- Playlists: Save and organize your favorite Plus assets into custom Playlists. Useful for grouping assets by project, mood, or category.
- In-App Updates: Studio now supports automatic updates. Users will receive an update prompt and can install new versions directly from the app.
- UI Redesign: Updated interface includes improved layout, faster asset previews, and new filtering options by industry and style.
- Notification list alignment.
- Randomizer Update: Randomizer now respects active filters when generating asset selections.
- Cinema 4D 2026 Support: New connector available for C4D 2026 compatibility.
Studio Connectors 1.5.3 – 09.15.2025
- Cinema 4D 2026 Support: Connector updated for compatibility with C4D 2026.
- Surface Imperfections Handling: Added logic to create necessary transform nodes when a Surface Imperfection map is added to a material that previously had no texture inputs (e.g., Glass and Liquids).
Studio App 1.4.0 - 06.11.2025
- Smart Send now available for Blender & Houdini: Send HDRIs, Gobos, Area Light Maps, and Surface Imperfections directly into your scenes – fully set up and ready to use.
- Randomizer: New tool for effortless exploration. Look for the little dice icon in the asset browser. One click and Studio will shuffle the assets and serve up a random selection from the library.
- UI Tweaks: Re-ordered side menu for smoother navigation.
Studio Connectors 1.4.4 - 06.11.2025
- C4D
- Glass and Liquids support
- Fix for Smart sending Surface Imperfections. Changed Ramp default from Smooth to Linear for Arnold and Redshift.
- Houdini
- Glass and Liquids support
- Smart Send
- Blender
- Glass and Liquids support
- Smart Send
- Unreal Engine
- Glass and Liquids support
- Unreal 5.5 for Windows
- Unreal 5.6 for Windows
Studio App 1.3.3 - 04.23.2025
- Smart Send: Send HDRIs, Gobos, Area Light Maps, and Surface Imperfections directly into Cinema 4D – fully set up and ready to use.
- Drag + Drop Models: Just like FBX. Quick and familiar.
- Browser-Based Login: Faster sign-in. Lets you utilize your browsers password managers.
- Copy Model Path: One-click access.
- UI Tweaks: New overflow menu, faster navigation.
Studio Connector 1.3.5 - 04.23.2025
- Smart Send for Cinema 4D. Send HDRIs, Gobos, Area Light Maps, and Surface Imperfections directly into Cinema 4D.
- Improved color space conversion support for all connectors
- UE support for Visual Studio C++ projects
- Fix for transmission and sss colors in Blender 4
Studio App 1.2.12 - 12.11.2024
- Send materials with Triplanar Mapping
- Compatibility with Adobe Substance Painter (Beta)
- Right-click Menu
- Send asset
- Send with Triplanar
- Show in finder/file browser
- Go to collection (navigates to original collection)
- Resizable image previews
- Enhanced search
Studio Connector 1.2 - 12.11.2024
- Triplanar Mapping support
- New Adobe Substance Painter (Beta)
- Support for glass and liquid materials
Studio App 1.1 - 11.01.2024
- Added a Lightbox
- Escape key closes lightbox
- Clicking on background outside lightbox closes it
- Left/right keystrokes progress through image carousel
- New fluid sizing for asset/collection cards
- Settings popup color changes
- Studio window now has minimum width (350px)
Studio Connectors 1.1.3 - 11.15.2024
- Added support for Cinema 4D 2023
- New Use Relative Paths preference for texture management in Cinema 4D
- Unicode character support improvements for Cinema 4D and Unreal Engine
- Improved OCIO ACES support for Cinema 4D
- General fixes and improvements for all connectors
- Fix for Image Node names in the Arnold material graphs
- Renamed C4D Connect to Studio Connect in the C4D preferences
Studio Connector 1.0.12 - 09.11.2024
- Added support for Cinema 4D 2025
Studio App v1.0.6
- Studio now supports network-based asset folders for download/export and drag+drop
Studio Connector v1.0.11
- Houdini 20.5 Support
- Houdini Redshift SSS Fix
- Houdini environment variable to disable logging
- C4D Octane SSS Fix
- C4D Arnold Specular Fix
- Unreal Engine Parameter Support and Graph Layout updates
Studio App v1.0
- Greyscalegorilla Plus Asset Library
- Individual Asset Downloads
- Intuitive Search
- Save Favorites
- One Click Send Asset
- Materials
- 3D Models
- One Click Copy File Path
- Textures
- HDRI
Studio Connector v1.0
- Cinema 4D Support
- Blender Support
- Houdini Support
- Unreal Engine Support